Creating a Custom Window Channel for a Chop Top 50’s Pontiac
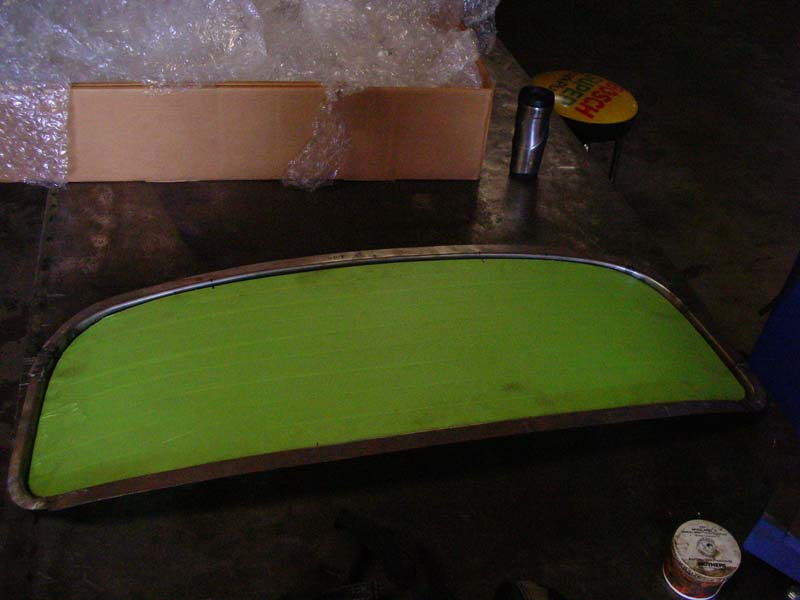
Now that the “A”, “B” and “C” pillars have been fully fabricated and welded, the next step is to create the custom window channel for my 1949 Pontiac glass to fit a 1953 opening. Some would say the next logical step is to create the sail panel and remove material from there for the window, but I disagree. If I build the window channel to fit the window and the vehicle without all of the sail panel material in my way I can make sure the window fits well in the “space” allotted, not to the metal of the car. This then give me the chance to mold the sail panel to the same shape as the window instead of the reverse. Since I don’t have a window channel for the window to rest in (since the window came from ebay) I have to create one from scratch. If you have the opportunity to cut all of the metal around a window when you buy the glass, do it!
This is a slow process, but with a shrinker and stretcher it’s fairly easy.
The basic concept is this; create two channels for the window: (see diagram)
1) The first “L” channel is what the window rests in (red in diagram)
2) The second “L” channel is what blends to the car (black in diagram)

how to create your own custom window channel (cross section)
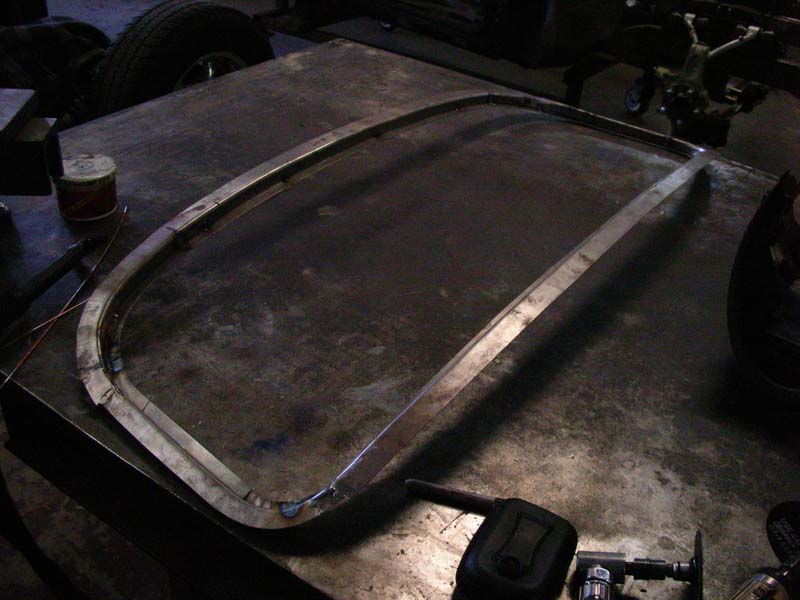
It would seem like you could bend a “Z” on the brake and save yourself a TON of time…but that would only work if your window was flat. We have to bend in both an X and Y axis because the window has a curved outline, and it is also contoured (bent) to fit the vehicle.
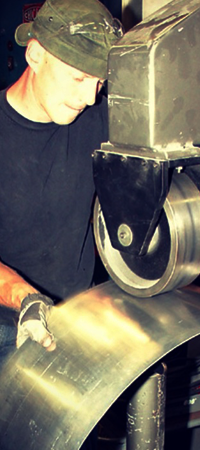
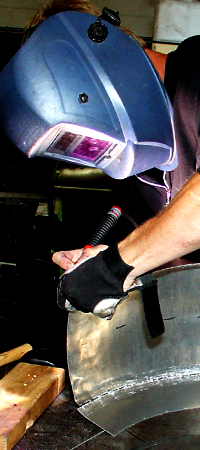
I begin with about 16 feet of 18 gauge steel bent into an “L” channel. The bend is approximately 1” on the long side and .5” on the short side (depending on how deep you want the window recessed. I then cut this into some short sections, I plan on going around the window twice and I like a little overlap, but it is essentially 12” per piece. To shape, use the shrinker and stretcher the form the pieces to fit. Moving the metal a little at a time and checking progress a lot. (See the diagram below)

How a shrinker and stretcher work to shape metal
I spent time forming all of the straighter sections of the custom window channel first, completing the corners thereafter. The nice part about this is you can easily fix your mistakes. If you stretch too far, shrink it a little. If you shrink it too far stretch it a little. Once you have a matching pair of window channels, you can tack them together for final fit to each other before it is attached to the vehicle. Again be sure to check the fit after each weld, a little heat in the right place can make these move quick.


Time Involved: 20-30 hours
Complexity (1 easy – 10 radical): 8 – pretty involved
If you have questions, ideas or would like a quote for building or chopping your own car please feel free to email me any time with the contact form on the sidebar. I will gladly quote full builds or complex one-off parts to assist you in your build. I’m here to help so lets go!